Thursday, May 31, 2012

ALL-AMERICAN MINI PIES


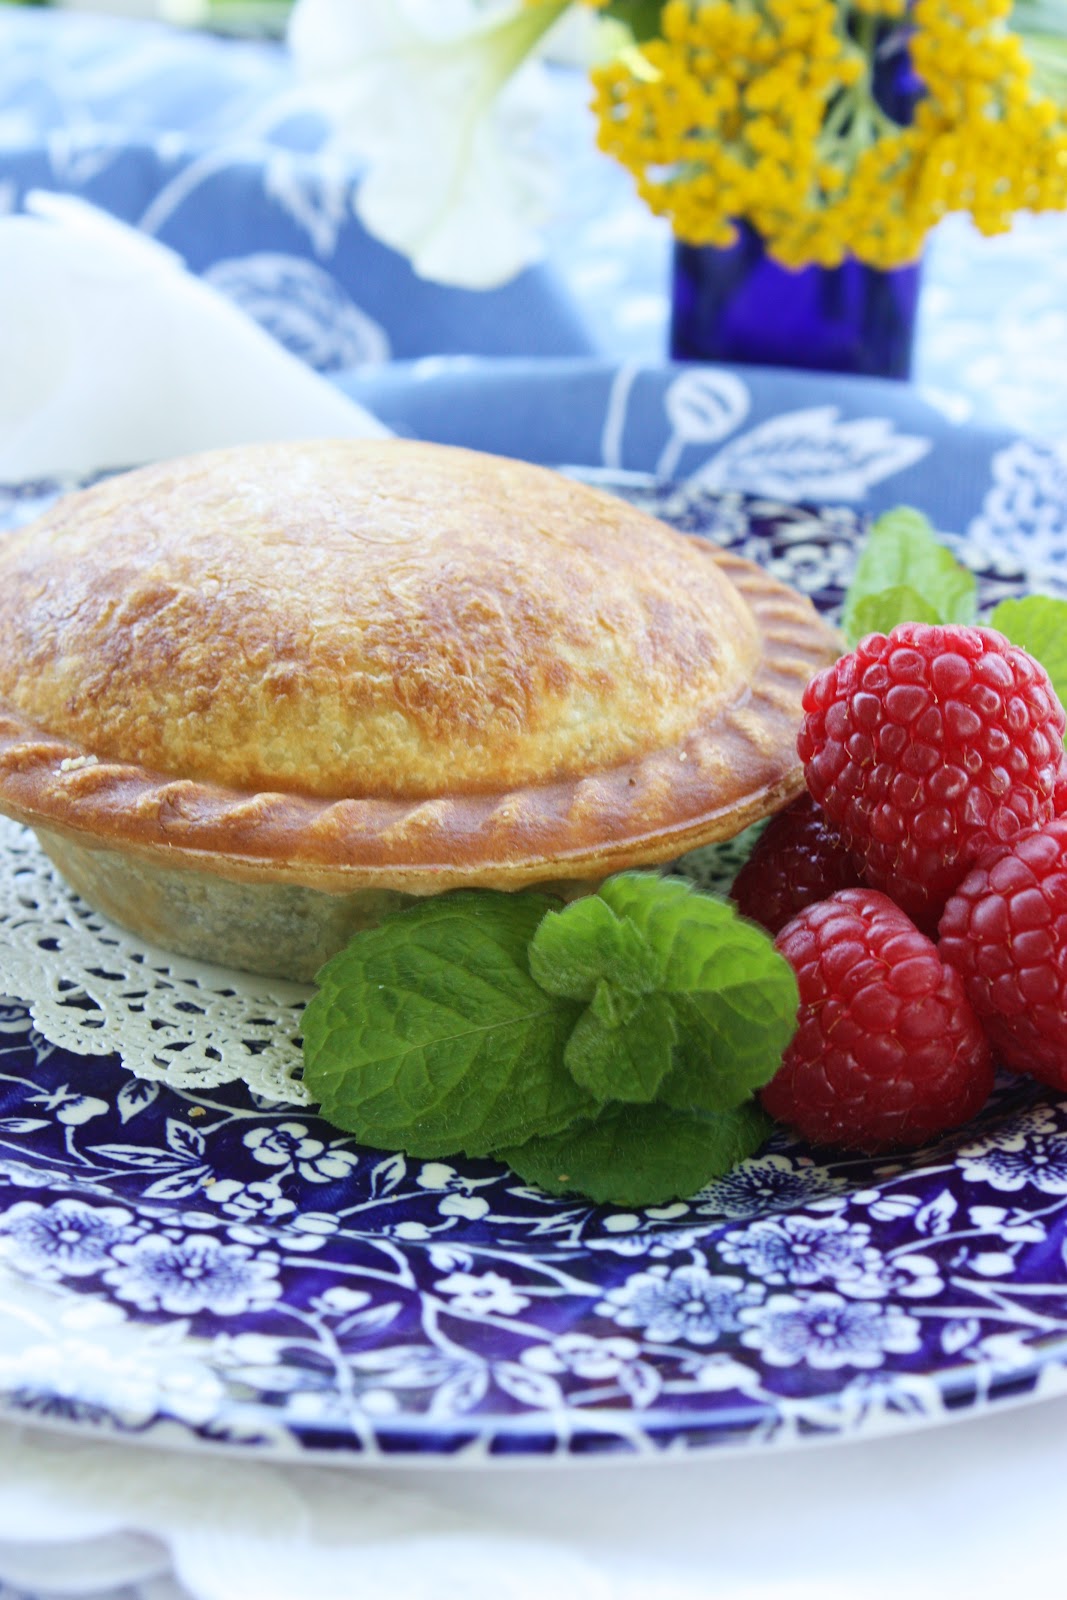
Summer is all about scrumptious fresh, just-picked flavors! What better place to put all those bright fruit flavors than in a pie... a cute little mini pie!

I have been a pie making machine lately. Me... the non-baker! Me... who LOVES the IDEA of baking... but  when it comes to actually making pies... not so much!  Me... who took nine years to learn how to make a descent pie crust!

My woeful pie making days are now over! Making these darling little mini pies was easy and so much F-U-N, FUN!...
It is all because of my new kitchen gadget...

The Breville Pie Maker (angel chorus singing... halo appears around Pie Maker)


I am not much of a gadget girl, but I have been flirting with the idea of buying a BPM for awhile now. When Wm-Sonoma had a $100.00 off promotion, I picked one up right away! A $49.00 investment was a terrific deal for a non baker to make towards pie making perfection!

Click HERE to visit the great folks at Wm-Sonoma and see the BPM!


I must confess my first attempts making pies with the Breville Pie Maker were NOT a smashing success. The pies came out way too brown... almost burnt on the top.

It took me another 2 tries to get what I would consider a stunning mini pie.  I did a good amount of tweaking to the recipe and technique in the instruction book but it was worth the effort!

Now just look at the little darlings I can crank out...


Here are some HELPFUL facts to know when using the Breville Pie Maker...

~ The best pies do not use homemade pie dough Yes, I AM serious... really!! Store bought, ready made pie dough makes the best crust in this machine. Now, this IS my kind of pie making!!!! 

~ The best pie tops are made from puffed pastry. Anything tastes better with puffed pastry!!! Sounds even better! The bottom crust is ready made pie dough and the tops are ready made puffed pastry. I sorta felt like I was a pie making cheater! Too easy! 

~ The filling needed to be cooked as the pie "bakes" in the machine for a short period of time... too short to cook the filling.  I cooked the filling beforehand, using frozen mixed berries, and added fresh berries when I filled the bottom crust. Again, so easy!

~ The instruction book calls for a fruit pie to be baked for 8-12  minutes.... WAY TOO LONG!  Like I said, I burnt my first couple of batches of pies. This is what worked best for me... I baked the pies for 5 minutes with the lid down, until the top of the pie was golden brown and then continued to bake them with the lid up for another 3-4 minutes until the bottom crust was done. This seemed to work perfectly!!!

~ The pies were delicious hot, right out of the pie maker. When cooled, they store well in an airtight container for a few days. We keep eating them as fast as I make them, so I don't know how they freeze.

~I have been cutting out circles (the cutters come with the pie maker) of pie crust and puffed pastry and freezing the rounds. That way I have practically no mess when I want to make pies. 

~ This is addictive! Now whenever anyone invites me for a meal, I'll volunteer to make pies for dessert!


STONEGABLE ALL-AMERICAN MINI PIES
(makes 4 mini pies)
1 package ready made, preformed pie dough
1 package puffed pastry
flour for dusting
1 1/3 cups mixed berries (I used blueberries, raspberries and blackberries), thawed
3 TBS sugar
2 TBS flour
1/2 tsp lemon zest
1 TBS lemon, freshly squeezed
1/2~ 2/3 cup fresh berries (I used blueberries and raspberries)
extra berries for garnish
mint for garnish

Plug in pie maker...

Combine berries, sugar, 2 TBS flour, lemon zest and lemon juice in a small saucepan and gently stir to mix. Cook over low heat until bubbly, stirring occasionally. Cook about 5 minutes until filling gets slightly thick. Take off heat and reserve.


Flour a work surface. For some odd reason, I really LOVE to do this!


Follow directions below for each image...


1. Take pie dough out of the package and lay dough on the floured surface. 

2. Cut out 4 bottom rounds with the bottom pie crust cutter. Put aside.

 Put 1 sheet of puffed pastry from the package and lay on the floured sheet. Lightly roll the puffed pastry with a rolling pin to get rid of the creases, but do NOT stretch the pastry.  Using the "top" cutter, cut out 4 pie tops.  Set aside.

3. Press the pie dough into the bottom of the each pie cup with the "pastry press".

Fill each pie with 1/3 cup of pie filling. Add a small handful of fresh berries to the top of the filling.

Put the puffed pastry tops over the pies.

Close lid and bake for 5 minutes. Open lid and see if the pie tops are golden brown. If not, close the lid and continue to cook, checking every minute.

If the pie tops are done, leave the lid of the pie maker up and let the bottoms continue to cook for an additional 3-4 minutes, until just slightly golden.

Remove pies from pie maker to a wire rack to cool.


The Breville Pie Maker is a fantastic small kitchen appliance!

The sky is the limit when it comes to pie making....
fruit pies... meat pies... veggie pies... fruit tarts... cream pies... nut pies... tartlets... quiche...turnovers...

I am also going to see what happens when I put ready to bake biscuits, rolls, cookies dough and pizza dough in it! How about mini monkey bread, bread pudding or calzones? 


What's your favorite pie... I can whip it up for you in no time!


Pin It

I am participating in...
FOODIE FRIDAY at Designs By Gollumn

Wednesday, May 30, 2012

BLUE WILLOW AND PINK PEONIES TABLESCAPE


The peonies are blooming here at StoneGable! Their big fragrant moppy pink heads bob in the breeze. They are my most favorite bloom... by far!

What a joy to go out to the garden and pick a big armful to use in a tablescape!

I have been planning this tablescape in my head for months and months, anticipating the arrival of these ballet pink beauties...


Can you smell them?


Of course, today's table was inspired by the peonies!  The table is traditional, sophisticated and full of blue and white pieces... just the right color to show off the peonies!


No tablecloth or place mats today. The luster of the mahogany table adds depth and warmth to the tablescape.

Each place is set with a stack of blue and white dishes.

Napoleon bee flatware rests on white ric-rac edged napkins... so girly!


As I was setting this table it occurred to me that I have not purchased new dishes for quite awhile. I keep recycling these!!!  I think my blue and white dishes are my most used!


Little blue and white footed sherbet bowls are just the right size to hold a pretty little peony bloom.


Cobalt blue glasses are paired with a pretty clear stemmed glass. One of my favorite tablescaping tips is to use different glasses on a table. They look so much more interesting than matching sets!


Blue and white pieces march down the center of the table to make an impressive centerpiece!


Two of the ginger jars overflow with the soft pink peonies. The color contrast is striking!


The peonies are with us for such a short time... let's sit and enjoy them while they grace us with their beautiful presence!


The Menu
Boston Bibb With Strawberries, Toasted Pecans, Bleu In A Champagne Vinaigrette

Pork Tenderloin With Dijon Marsala Sauce
Muffin Tin Onions Gruyere Stacks
Wilted Spinach With Sherry Vinegar

Elegant Strawberry Dessert
look for upcoming post


Pin It

I am participating in:
LET'S DISH at Cuisine Kathleen
TABLESCAPE THURSDAY at Between Naps On The Porch

Tuesday, May 29, 2012

THE POTTING TABLE


It is nice to have a little spot in the shade to plant, pot and play! My potting bench is a place of constant creation, commotion and lots of good old dirty work...

The little potting bench on my back porch is just the place to spend time gardening on a hot afternoon!


The heat today chased me out of the garden and onto the back porch where I am digging in the dirt on a smaller scale! The white geraniums I used to decorate the house this holiday weekend came outside to be potted!

After potting the geraniums, this area was quite dirty... so I just hosed everything down. I love having a place that I can just wash away the mess!


My potting bench was made for my back porch. A very simple design, it is more functional than decorative.

Things come and go on the potting bench all season long!  

I potted the white geraniums in a wire egg basket along with some purple lobelia.


A chicken feeder overflowing with frilly white plants and a few little terracotta pots fill the narrow top shelf of the potting bench .

A couple of hooks hold garden items I am using.

The best part about this potting bench is that it has running water. I love the simple spigot and the vintage enamel bowl that is used for a basin.  Because the basin has no drain, I also use it to mix potting soil with compost or to carry veggies from the garden to the bench. 

If I fill the basin with water to wash veggies etc. I just pick the basin full of water up and pour it over my potted plants on the porch!


The potting bench has a nice tall bottom shelf.


I keep an old milk box filled with garden gloves, trowels, weeders etc. on the shelf.   This treasure was an auction find!

 I remember my grandmother had a milk box very much like this when I was just a wee little girl! I think it somehow ties me to her! I love the faintly familiar sound of the lid banging shut!


A catch-all basket and a rusty galvanized planter filled with summer annuals also find a home on the bottom shelf!


This is one of my favorite "places" at StoneGable. I can putter and be creative and get my hands dirty!


Pin It

I am participating in:
The Great Outdoor Linky Party at Thistlewood Farm
Favorites On The First at The Polohouse


Sunday, May 27, 2012

WEEKLY MENU


Happy Memorial Day Weekend everyone! I hope you are having a fun "unofficial" first weekend of Summer 2012!

StoneGable is full of family and friends and we are eating ourselves silly! 

Tomorrow you will find us at the corner of the Creamery in Strasburg, waving our flags as we watch the Strasburg Memorial Day Parade! This is one of my favorite local activities of the whole year!!! A real slice of Americana!

SUNDAY SCRIPTURE~ MEMORIAL DAY 2012


God Bless our brave men and women in the military!

Memorial Day 2012

Saturday, May 26, 2012

THE FIND


On a recent trip to the Eastern Shore of the Chesapeake Bay I found this beautiful big blue and white bowl in a local antique shop!  I knew it belonged in my kitchen... specifically, on my kitchen table! It was love at first sight.

But, to bring it home... the beautiful bowl had to not only have a love relationship with me... but the price had to be right!  Oh, I wanted this bowl to be "THE FIND"! 

 I turned the bowl over to see the price tag and...


The bowl had my name on it!!!!!  Not really, but it should have because it was a very, very, did I say very?... good price. 

This blue and white beauty is in perfect condition. The inside of the bowl is GORGEOUS! (I'll post picture of the inside when I plant the geraniums outside!)

 It adds just the right pop of color to my neutral kitchen!


Don't you love coming across "THE FIND"!


Pin It

Thursday, May 24, 2012

APRON STRINGS


If you come to visit me at StoneGable, I will greet you at the door in an apron. It is just part of my "uniform"!

I started wearing aprons as a young wife to save my clothes from getting dirty. As the years passed I continued to wear them... to gather up veggies in the garden, wipe salty little tears, dry off dishes and messy  hands, and to hold all sorts of sundry things that end up in their big deep pockets

. Aprons also decorate my kitchen. They hang on very unique wall hooks...


I love these plate hooks! They are all part of one piece... all joined together!  
Aren't the designs on each plate so unusual?


I added the blue and white plate above. I thought it gave the arrangement a nice balance!


The plate hooks and the aprons give my neutral kitchen a bright splash of color!


I am working on making my own version of these plate hooks... I feel a tutorial coming soon!


Pin It

I am participating in:
SEASONAL SUNDAYS at The Tablescapers