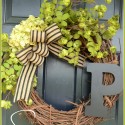
A beautiful front door wreath welcomes friends and guest to your home before you even open the door!
And if you make it yourself it conveys your personal touch... your style...your warmth, as no two wreaths are exactly alike.
Bright and brambly, this spring wreath looks like a designer wreath... without the designer price tag! And it is an easy DIY project... here's how to make one for your own front door...
There are many forsythia wreaths out in all the craft stores that can go from the bag they are put in at the check-out counter to the front door... BUT they are not very pretty, full or inviting!
Make your own one-of-a-kind wreath... it is easy and such a stunning spring welcome to hang on your front door!
StoneGable Forsythia Wreath
2 grapevine wreaths
small nest
3 small eggs
forsythia branches
white flower picks
sticks, twigs, brambles
florist wire
hot glue gun
decorative ribbon
dust buster (my best friend when doing messy DIY projects)
blow dryer
To make a wreath that has a full, lush, designer look start by tying 2 grapevine wreaths together with with florist wire. I secure it in 3 or 4 places.
I found a wreath with a mossy look, Great detail, as I am not filling in the whole wreath.
Just putting 2 wreaths together will add so much depth and heft to your wreath.
Forsythia is a naturally untamed, twiggy bush. Its beauty lies in its wild nature. We will want a wreath that echos that same look.
Decide where the top of your wreath will be. We will call that 12 o'clock. At about 4 o'clock on your wreath begin building a base of forsythia branches and white flowers. You will add more forsythia later. I had rather large forsythia branches I cut apart to make smaller stems that would be just the rights size for the wreath. Use hot glue liberally, you want the stems to stay.
Add sticks and twigs and brambles going up the right side of the wreath.
Add eggs to your nest and secure the nest to the wreath.
Add forsythia branches under and on the left side of the nest. Add white pick flowers. Fill in more forsythia etc. on both sides of the nest.
Keep picking up you wreath and hold it at eye level to see where you need to fill in with more floras and brambles to give your design depth. Remember, people will see the wreath hanging up... a totally different perspective than a wreath lying on a work surface.
We are now going to fill in the wreath from 9 o'clock to about 1 o'clock.
Begin filling in the area with forsythia. Begin about 9 o'clock and work clockwise around the wreath. Stop adding branches at about 11 o'clock and let the wispy ends of the forsythia branches bend over to 1 o'clock, following the lines of the wreath.
Fill in the side of the wreath as well. Let some of the stems stand out from the wreath giving it a loose natural look. This is very important as it gives life and movement to your wreath.
Add white pick flowers here and there.
You may want to add extra sticks, twigs and brambles to give your wreath more natural feel.
When you are happy with your wreath. Give it a good shake. If anything is loose secure it with lots of hot glue.
Use a blow dryer set on the hottest setting to melt away any hot glue spiders. This works like a charm!
Ta-Da!
What a friendly welcome!
You might also like this Cherry Blossom Wreath DIY. Click HERE for a Tutorial.

Remember to


.jpg)


Beautiful... and forsythia is one of my favorite blooms this time of year (unfortunately, it is quick to go but with this wreath, it could last so much longer!) Great job. Thanks for sharing this and hope you enjoy the rest of your day! coco Jalon
ReplyDeleteOh I love this wreath. Pinning it now! Love it! Hugs and blessings, Cindy
ReplyDeleteSuch a beautiful wreath and forsythia is so pretty!
ReplyDeleteThanks for sharing and I hope you have a blessed week!
Aledia
Very pretty. I love how the yellow pops out. I'm your neighbor at Southern Hospitality's link party :) First visit to your blog - love it!
ReplyDeleteShari
Turnstyle Vogue
Just beautiful....love the little bird nest you added too! Very sweet :o)
ReplyDelete~Des
This comment has been removed by the author.
ReplyDeleteTest # 3
ReplyDeleteYours is the MOST beautiful ! Sending love, Yvonne...
ReplyDeletechecking to see if word verification is off.
ReplyDeleteThis is beautiful, Yvonne! Very welcoming, indeed! I love the putting two wreaths together ~ I tried that one year at Christmas putting a smaller wreath inside a larger wreath. I loved the look! Love the addition of the nest with eggs, too. It wouldn't be Spring without those added in!
ReplyDeleteSo pretty. Love the nest idea. Thanks for sharing.
ReplyDeleteThis is a lovely wreath. Nothing says Spring to me like Forsythia and bird's nest! Thank you for the great tutorial! Your wreath is stunning! Thanks for stopping by my blog today! Your kindness is appreciated!
ReplyDeleteYvonne I love this wreath, forsythia is a favorite! I am excited to make my creation!
ReplyDeleteI hope you will come and see the feature I have on an amazing sculptor.Also painted projects coming up!
xoxo
Karena
Art by Karena
The 2012 Artist Series
Beautiful..I love my forsythia, but it is just about to wane now...great tutorial...I also love to take a grapevine wreath and snip some of the vines and it becomes less bulky and more whispy in appearance!
ReplyDeleteThanks Yvonne...
Hi lovely lady.
ReplyDeleteI also Love your Spring wreath so Beautiful. you always do a great job.! Thanks so much for your sweet comments on my Spring Tablescape so sweet of you. I hope you have a wonderful week with your family.
XXOO Diane
Good afternoon! Your wreath looks beautiful, GREAT job!!! The forsythia is so pretty and Springy! It looks fabulous on your front door! Can't wait to see you! I may hop on over to that party and see what's going on. XO, Pinky
ReplyDeletePS, found my camera and did a new post!!!
ReplyDeleteJust lovely. Forsythia is one of my favorites this time of year.
ReplyDeletePretty! Hot glue spiders, LOL. I always get those, thanks for the tip.
ReplyDeleteXO Cindy
Wow... This is gorgeous! You've inspired me to bring out the wreaths from the attic and doll them up for spring! I'm your newest fan. Thank you for stopping by Bella Nest and for the sweet comment! =0)
ReplyDeleteI'm so happy to see one of your tutorials again :) Love the little nest on this beautiful wreath!
ReplyDeleteHi Yvonne, your wreath is beautiful. I have always loved forsythia, we had a yard full of it when I was growing up. Thanks for stopping by and for your prayers. I appreciate it. And it is sooo good to have you back. xo
ReplyDeleteYvonne, it's lovely and it is so good to have you back in blogland. I have been so busy getting ready for a party at the ranch, that I haven't had time to linger on your blog but will when it is over.
ReplyDeleteYvonne those are beautiful wreaths! I especially like the cherry blossom one!
ReplyDeleteOh my dear friend Yvonne, take a bow!
ReplyDeleteYou've put a "spring" in my step with your creative loveliness.
Have a blessed day!
Hi Yvonne, Our forsythia is just beginning to bloom now and I just love it! I am guessing you are using "faux" forsythia (say that three times fast!) and wondering where you found those nice stems? Have a wonderful day. It's sunny but cold here. Linda
ReplyDeleteWelcome back! It's always good to see your fabulous posts and tutorials.
ReplyDeleteYvonne I love them both! They're beautiful!!
ReplyDeleteI love your wreath. It is so welcoming and so spring.
ReplyDeleteForsythia is one of my favorite early spring flowers and your wreath is perfectly splendid. Thanks for the lesson. Olive
ReplyDeleteGosh, this wreath is just beautiful! Thanks for sharing that tutorial with us. I never have heard that trick to get rid of glue gun "spider webs". I saw your post over at Southern Hospitality Door Decor party.
ReplyDeleteVery pretty and springlike. It shows up so well on the dark front door. I love forsythia. Well done!
ReplyDeleteWhat an awesome idea! Thanks so much for the tutorial! I wish you would link this up to our party! Seriously....who doesn't love forsythia!
ReplyDeleteblessings,
karianne
Oh sweet friend, the wreaths are so beautiful! Thank you so much for the tutorial on both, I will try one and show you...maybe the one with the cute nest with eggs! Lots of hugs and so nice to hear from you dear Ivonne. Love,
ReplyDeleteFABBY
Yvonne, I am so happy that you are back! You are an extraordinary wreath maker, and truly one of a kind in blogland! Fantastic tutorial!
ReplyDeletexo-Lisa
So pretty! I need a wreath on my front door so this post was perfect timing. I'm going to remember your tip about tying the two wreaths together. Thanks for the tips!
ReplyDeleteVery pretty wreaths. I have to say although I love the forsythia wreath, the cherry blossom is my favorite by far. Thank you for the tut.
ReplyDeleteHave a great day.
So beautiful, Yvonne. Just the right touch!
ReplyDeleteBarb
It speaks Spring! Thanks, now to dig out a wreath from the attic. Have you ever made one using Magnolias? Whatever you do, I know it will turn out beautifully.
ReplyDeleteCindy Sue
This is so pretty I am pinning it! My husband and I are in the process of doing some landscaping and I know nothing about plants. We just discovered the Forsythia and we plan on planting one to have in our yard. Hopefully I will be able to do this next year with our out forsythia.
ReplyDeleteI love forsythia and this is a perfect spring wreath. Great tutorial Yvonne. Have a lovely day.
ReplyDelete~Emily
The French Hutch
Oh, so pretty, Yvonne. You are the Queen of Wreath Making, ya know. :)
ReplyDeleteI made a fall one last yr. using your suggestions and instructions and love it. I had never thought of using TWO wreaths together but it sure makes for a full, beautiful wreath. I will get it out just as soon as summer ends. :)
xo bj
Boy you make this look easy....love the touch of the little nest with eggs. So sweet and charming and the perfect way to welcome in spring!
ReplyDeleteI just love wreaths...I don't have enough doors for all of the ones I'd like to make and hang. I love the little nest...great touch!
ReplyDeleteI LOVE this wreath! I actually JUST painted my front door and was looking for something to spice it up with! This is perfect! Thank you :-)
ReplyDeleteGreat tutorial and beautiful wreath!
ReplyDeleteThanks so much for linking it up at our "It's a Cinch" party!
:)
Linda
www.itallstartedwithpaint.com
This looks so lovely. I would love for you to drop by My Dream Canvas as well :-) I’m visiting from Wow Us Wednesdays. Really like your blog.
ReplyDeleteCute and easy! I like it.
ReplyDeleteBeautiful!
ReplyDeleteCaught my eye right away.
Visiting via Wow Us Wednesdays.
Will visit again soon.
Elizabeth
This is absolutely beautiful. I'm pinning it. :) Thanks so much for sharing this at our party!
ReplyDeleteKarah
I adore forsythia and your wreath is stunning!
ReplyDeleteSo glad you shared at our Cinch party.
Kelly
I Love the Forsythia wreath. Love your technique of doubling up
ReplyDeletethe wreath vines and love the whispyness.
I don't know what you have been told but to Me You are the Best!!!
This is stunning and super easy to do,my hank you so much for the inspiration.
ReplyDeleteRamon
Rowhouseblog.com