Wednesday, February 27, 2013

TUTORIALS TIPS AND TIDBITS #37


Welcome to

TUTORIALS TIPS AND TIDBITS
#37

I can tell we are all ready for Spring! Lots of great seasonal projects last week...
Thanks everyone for participating...


Here are a few creative features from last week...

One of my favorite nibbles is a cheese board. I received a beautiful one a few years ago... but you can make one that is just as nice! This CHALKBOARD CHEESEBOARD was shared by MOM 4 REAL.
Would't this make a great gift!


chalkboardpaintedtilecheesetrayboard6


Here is an easy way to BLOW OUT AN EGG for Easter Decorations from THE CREEK LINE HOUSE.  I'm starting today!


CREATIVELY SOUTHERN wrote a wonderful post about WHY BLOG? It's a great primer for anyone thinking about blogging and a wonderful reminder to all of us bloggers!


why blog


I GOTTA CREATE made these upscale TUXEDO AND PEARLS OREOS. Oreos have never looked so fancy!


I'm wild about the paint finishes from VILLABARNES! Head over there to ooooh and ahhhh over FINISHES I LOVE and pick up a few great hints along the way!


Don't we all love love love chandys! FROM MY FRONT PORCH TO YOURS transformed an already beautiful light to an over-the-top stunner by adding NEW CHANDY BLING. And as a bonus she is showing off her sweet spring decor!


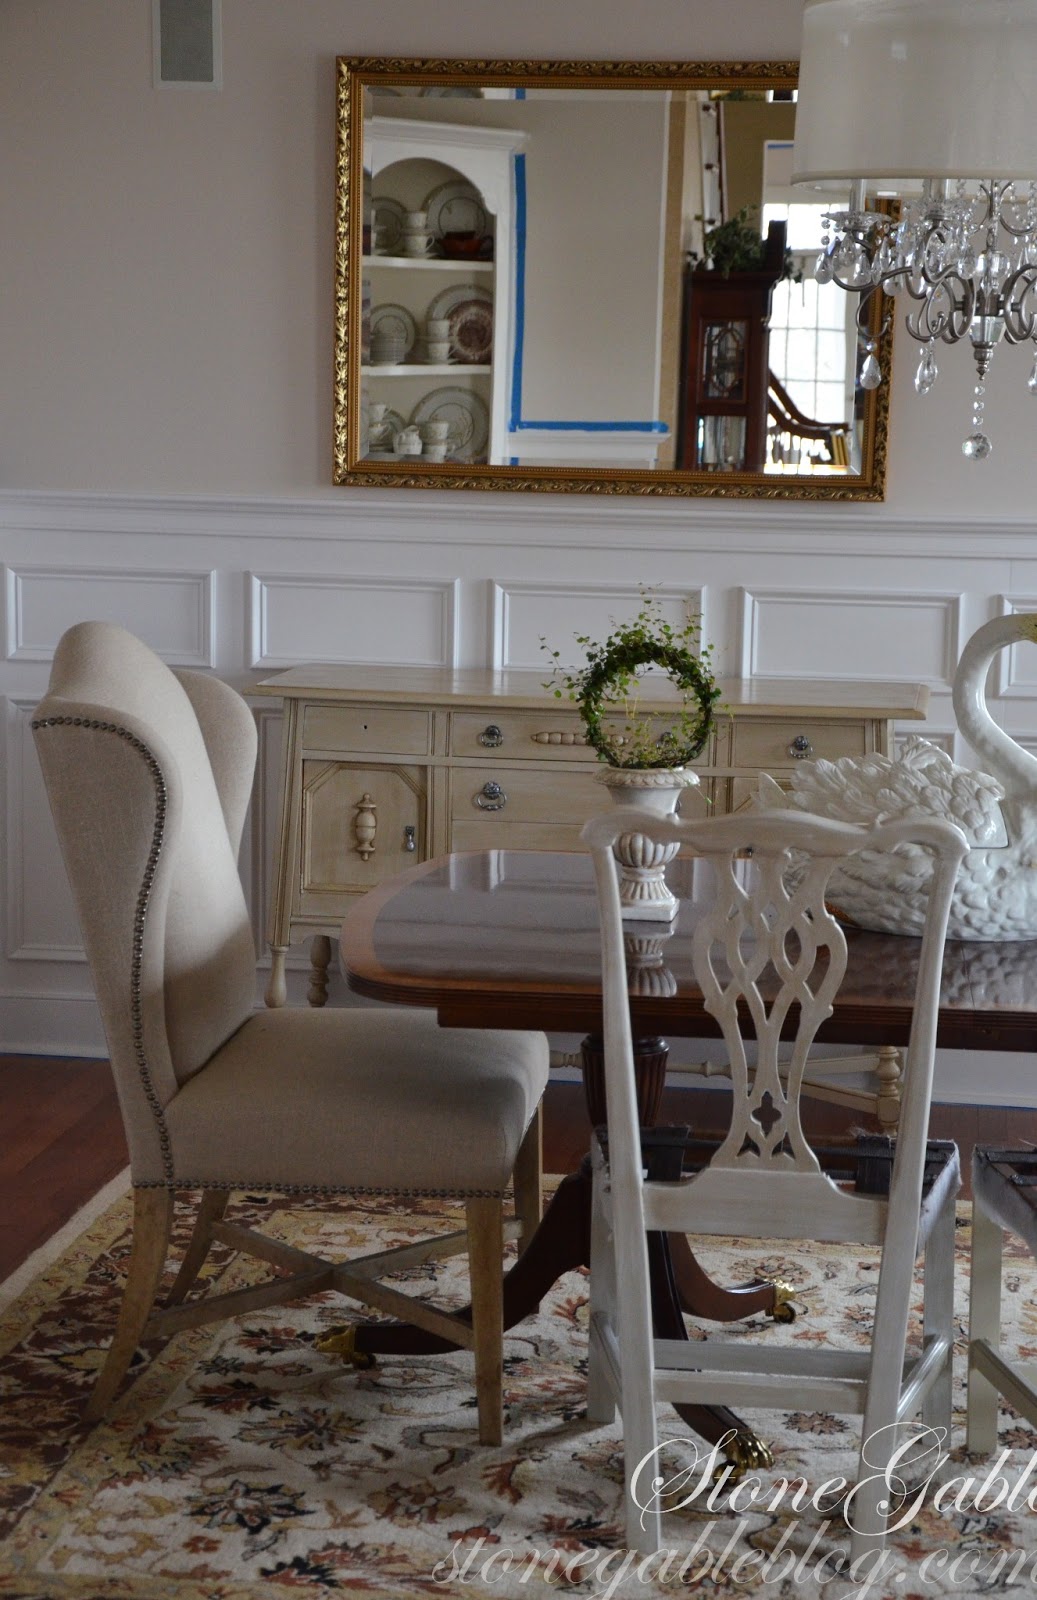
Topiaries make me sigh! They are so beautiful... if I can keep them alive long enough!  ALL THINGS HEART AND HOME has a wonderful DYI IVY TOPIARY tutorial! On my must-try list!


You can make any letter or note much prettier by MAKING AN ENVELOPE OUT OF ANY PAPER. Head over to THE FORGOTTEN ART OF LETTER WRITING to see how.


Eclectically Vintage


We all love reveals, don't we.... here is an adorable KID'S BATHROOM REVEAL from QUEEN B CREATIVE ME.  Lucky, kids!


This week I'm sharing how to make a SPRING BIRD'S NEST DYI.  Very easy and a little messy. And much more economical than those nests you buy in speciality stores!


If you have been featured at TUTORIALS TIPS AND TIDBITS please grab a "Featured" button from my sidebar.


Now let's see what great TUTORIALS, TIPS AND TIDBITS  you have for us this week!

Remember, any little tidbit will do!

* Please link your post using your permalink
* Please link back to TUTORIALS TIPS AND TIDBITS in the body of your post. You can find my button TTT button on my sidebar. No mass link page, please!
* Visit other TTT participants... let's all visit at least 3 others and comment
* Please link up only photographs that belong to you.
* It would be nice if you would follow me, thanks!
* If you would like to pin an image on Pinterest, please pin it from the original source, not StoneGable
* By participating, you are giving me permission to use your linked post and picture as a featured link in an upcoming TUTORIALS TIPS AND TIDBITS. I may also use your post and any image to alter for a TTT title page and facebook announcement.

SPRING BIRD NEST TUTORIAL


Even though the wind is howling and the rain is pelting against my windows and it is brrrrrr... cold, I am thinking Spring!

Here at StoneGable, the birds are not building nests yet, but I am! These homemade nests are a bit messy but easy and fun to make! 

I'll show you how...


I started working on my potting bench outside, but the wind changed direction and I was getting soaked... even under my porch! So I brought this project inside to finish it.

If you can work outside or in a garage that might be best... it is a little messy... but very rewarding!


STONEGABLE SPRING BIRD NEST TUTORIAL

Materials:
Spanish moss
green moss
sticks, twigs, grasses, hay, or any kind of natural fluff
dried leaves
spray adhesive
spray acrylic sealer in matt
tiny eggs and feathers (optional)

For this project I just took a walk around my yard picking up small sticks and twigs, breaking off spent Astilbe stalks, lemongrass stems (they look like hay) and dried leaves.


This is a very inexpensive project... most of the fluff comes from things that are right outside your door!


Form a handfull of Spanish moss into a roundish disc. I did this over the basin in my potting bench. Very messy! Do I keep saying "messy"? 


Hollow out the Spanish moss to form a loose nest shape.  


Spray adhesive all over the nest and work the Spanish moss into a more compact nest.  I did all adhesive spraying inside a small box.  


Begin to add green moss around the edges and in a few areas inside the nest hollow. Spray adhesive to make everything stick together.


Take the twigs, sticks, leaves etc and begin weaving them around the nest. Spray adhesive liberally to to hold together.   


Continue to add more natural material to the nest, like grasses and dried leaves.  Add more moss if needed. Don't forget to put some soft grasses or hay in the hollow of the nest. 

Remember to use spray adhesive to hold it all together.


(Now here's where I had to move inside... I was wet and shivering) Add eggs and a feather or two. I love the little aqua eggs with the Spanish moss nest... the colors play nicely together.


Once the adhesive is dry on the nest seal it with a matte finish spray sealer. This is best done outside. Let it dry completely


I found a big curly stick to slip under the nest to give the illusion it is on a branch.


I've made several nest to decorate StoneGable and to use in an upcoming Bridal Shower for my soon to be daughter-in-law.

These are SO much more economical than buying nest... and I think their brambly look is more fetching, don't you?


Remember to

Pin It


Tuesday, February 26, 2013

PAINTING A BUFFET


Let's make a deal... If you don't look at the blue painter's tape everywhere or the uncovered electrical sockets or the storage boxes or the ladder in the background or the missing hardware on the buffet or the mess still around because we are not finished painting... then I would love to show you the buffet I painted over the weekend.... 

Deal?     Okay...


Here is the buffet my friend Fiffer and I found last Thursday...


She was just what I had been looking for. I did feel a little guilty painting her because she is really beautiful just how she is...

Here she is painted and in my dining room... THAT WE ARE STILL WORKING ON!


Now I'll give you a little look at the dining room ... ignore the chairs without seats... ANOTHER work in progress... but this will give you a feel for the dining room's new look.


I painted the buffet with Annie Sloan Chalk Paints in Country Grey. Yes, I know that it does not look grey at all. The color is a dull, greyed down gold/ beige... after the undercoat was dry ( I try to let it sit 24 hours) I sanded it and put a wash of ASCP pure white over it.


That gives the buffet a soft striped look... very French Provincial.

I don't follow the usual protocol for painting and waxing a piece... I'll show you what I do and why next week.


I then used clear wax and a very light sludge of clear and dark wax to give the buffet depth.


I buffed her with Bobby's drill and a buffer attachment. His idea! This made such a lovely soft shine on her!

I sorta felt like I was cheating... not doing it all by hand... but I was working with a pinched nerve in my back!  Pinched nerve or not... the buffer will be a must for every painting project from now on!


I used GEDEO silver gilding wax to give the original hardware a new look. I like to let some of the old color show through just a little. It brings out the detail in intricate hardware. 

I am still looking on line for matching pieces to replace the ones that were missing. If you know of a good source please let me know.


I am letting the piece "cure" before I put anything on top of it. In a few days it will be ready to decorate. That will be fun!


In the meantime... I'll be ripping off the upholstery of another dining room chair. THIS time I have the right tools! To see the process click HERE.


Pin It


Remember to join me for...

TUTORIALS TIPS AND TIDBITS

show up and show off your creativity... any little tidbit will do!

Link goes live Wednesday at 8:00 pm


Sunday, February 24, 2013

ON THE MENU MONDAY~ WEEK OF FEB 25, 2013


I'm so ready for spring... I feel like this has been my mantra for the last couple of weeks. I may be ready, but Mother Nature is not! It has been bitter cold here at StoneGable! I'm ready to switch my cooking to spring mode... lighter foods and delicate flavors. But not while it's still soup and stew weather outside.

I'll have to wait a just a little longer... 

So, here's what 's on the end-of-winter menu...


MONDAY~ SLOW COOKER DAY


TUESDAY
Roasted Asparagus


WEDNESDAY
Mashed Potatoes (make extra for Friday)
Green Beans in Garlic Oil


THURSDAY
 Wide Noodles


FRIDAY
PANKO CRUSTED POTATO CAKES (make extra for next week)
Roasted Carrots and Onions


SATURDAY


SUNDAY~ SOUP DAY& SLOW COOKER DAY
Crusty Bread


 Picking just a few features each week is so hard, but this week it was painful! So many great links last week!!!

Here are some yummy features from last weeks OTMM...


GALUMPKIES from DESIGNS BY PINKY speak to my Hungarian roots. We call them Halupkies... Oh, these are delicious and a big family favorite!!! Did you save some for me, Pinky?


I think crepes are a trip-to-France dessert! COOKING ON THE FRONT BURNER makes CHOCOLATE STRAWBERRY CREPES so romantic! These look so delicious!


These SPINACH LASAGNA ROLL-UPS from IT'S OVERFLOWING look company worthy, but they are easy to make on a weeknight too! YUMMY!


Want an easy and impressive dessert... give CHURRO CRISPS WITH HOT FUDGE SAUCE from SHAKEN TOGETHER a try. They are simple to make and very upscale!


baked cinnamon sugar churro crisps with hot fudge sauce at shakentogetherlife.com


I am always looking for a main dish that is simple and has great flavor! I found a great one... FRESH ORANGE PORK TENDERLOIN from SIMPLE LIVING AND EATING. 


orange pork


Let's have dessert... how about CHOCOLATE POTS DE CREME from BLACK HOLLOW HOMESTEAD. And they are topped with White Chocolate Whipped Cream. Oh my!


Chocolate Pots de Creme with White Chocolate Whipped Cream from Black Fox Homestead


I think this is the most brilliant idea... MAKING GRANOLA IN THE CROCK POT. Head on over to EVERYTHING HOME WITH CAROL for the recipe.


make granola in a crockpot


PIZZA AND SPAGHETTI CASSEROLE  from THE BEST BLOG RECIPES sounds so good and comforting! I could probably eat the whole thing!


Here is another winner slow cooker recipes... CROCKPOT LASAGNA from THE CHARM OF HOME.
This is another company worthy meal that can be made on a weeknight! This is on my must try list!


This week's Menu Plan is from ANGELS HOMESTEAD.  Last week April featured some great eats like... Cowboy Burgers, Twice Baked Potato Casserole and Chocolate Cream Puffs! Can I come over for dinner, April?


NOW WHAT'S ON YOUR MENU...


Thanks, for joining us and sharing!

* Please link your post using your permalink
* Please link back to ON THE MENU MONDAY in the body of your post
* It would be so nice if you followed me!
* Please visit other OTMM participants
Please link up only photographs that belong to you. 
*By participating, you are giving me permission to use your linked post and picture as a featured link in an upcoming ON THE MENU MONDAY.