

I recently attended an Annie Sloan Chalk Painting class at CATFISH CREATIVE FURNISHINGS and came home with a great little painted piece and a head full of FABULOUS techniques, tips and ideas! This hands on class was invaluable and our teacher, Celeste, was fun and informative and so so creative!
It was a day of ASCP total immersion! I learned so many interesting techniques! But there was one thing I thing I took away that will make a HUGE difference in the way I paint EVERY piece of furniture...
I think it is the best tip I will ever get and I want to share it with you...
PAINT A PRACTICE BOARD BEFORE PAINTING ANYTHING ELSE!

This sounds like such a simple thing... a little extra step...
But it is one that could make the difference between loving a newly painted piece and ruining it!
Painting a practice board will help you focus in on the colors and techniques you will use to transform a piece. You will be able to see what your piece will look like even before touching it with a paint brush.
And once you get the color and technique just perfect on your practice board you have something to use to compare your piece with as you paint it.
What a BRILLIANT idea!

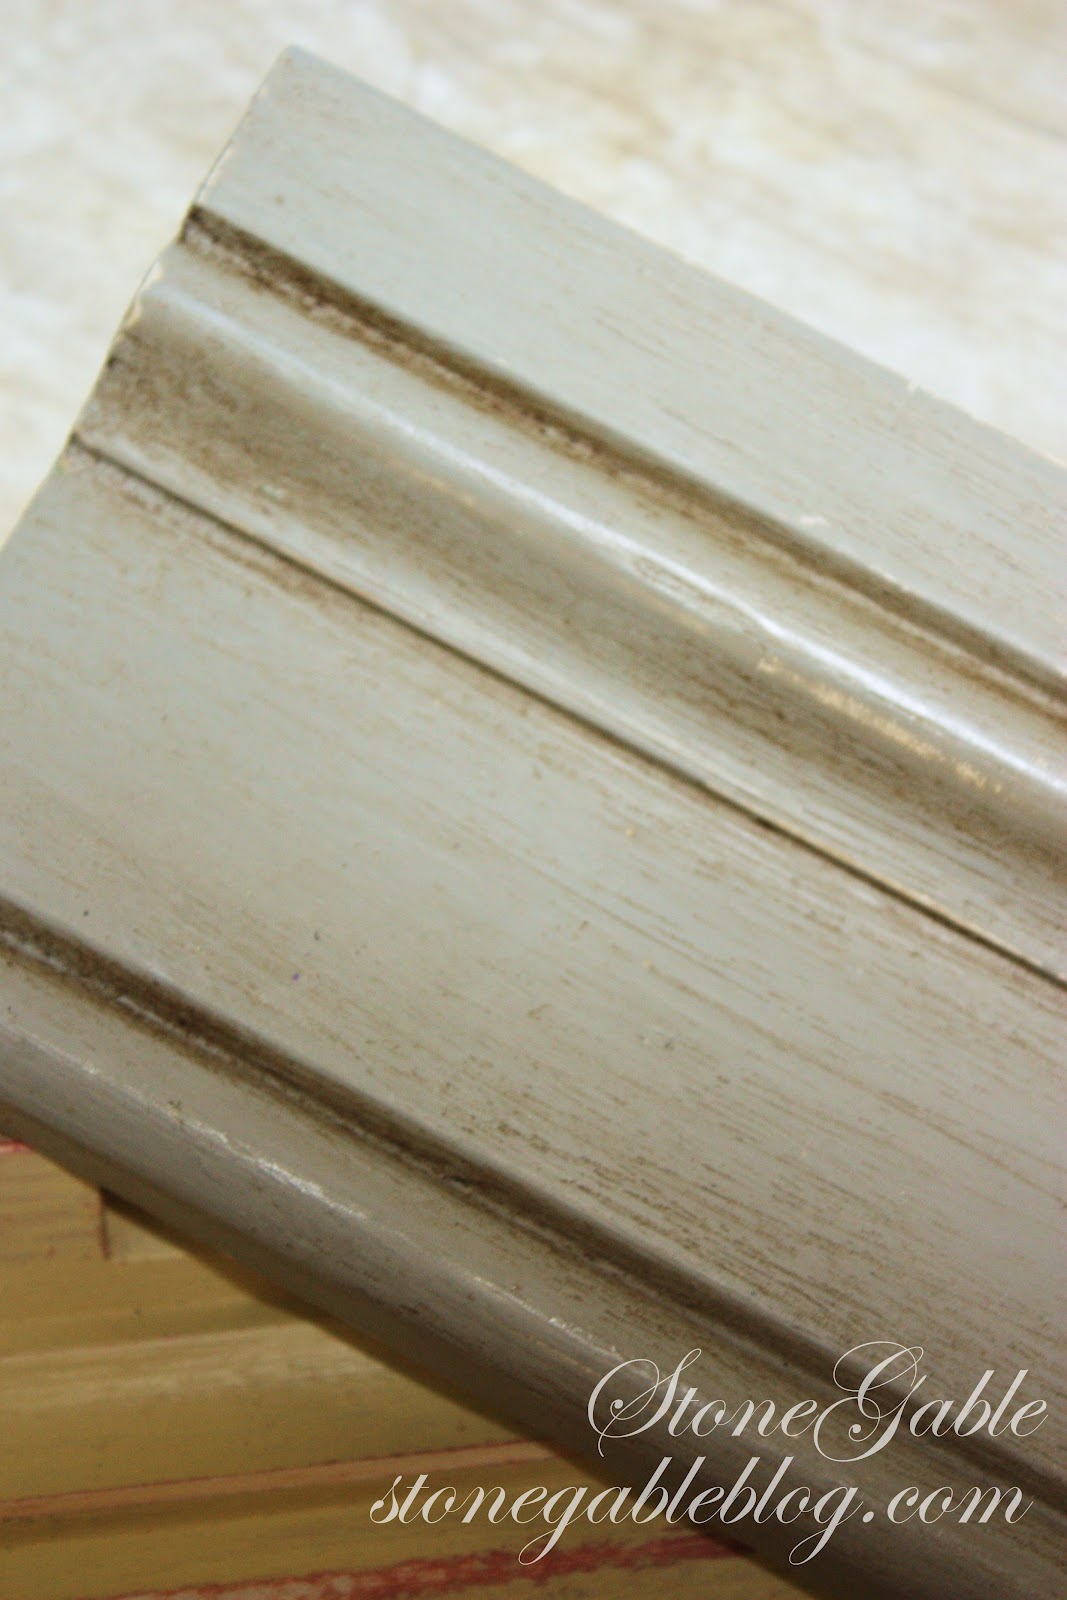
Choose a practice board with curves and raised areas. It will give you a realistic preview of how a real piece of furniture will look! Don't settle for a flat board! Most pieces we paint have interest.

A piece of baseboard or crown molding makes a great practice board! Again, Brilliant!
Buy a large piece and have it cut into 4 or 5 inch pieces. Most hardware stores will do this for you for free!
Baseboard trim comes in 8 ft (or longer) strips.
That means you will get between 19 and 24 practice boards for under $20.00!
Baseboard trim comes in 8 ft (or longer) strips.
That means you will get between 19 and 24 practice boards for under $20.00!
You can choose white or natural wood molding depending on the surface of the piece to be painted. If you have piece that has a finish on it you will probably want to use the white molding because it mimics the finish on a piece of furniture.

Here are a couple of practice boards I painted in class...
Rough Finish using Antibes Green. This finish was achieved by putting the paint in the refrigerator... can you believe it!

This finish is just stunning... it is a Color Wash using Old White as a base and a Coco wash. I can't wait to show you how easy it is to do a wash. You will be amazed how we learned to remove the wash to give it this grained look!
I taped the practice board in half and then used the clear wax mixed with a tad of dark wax on one side and the dark wax on the other.
Taping a board is a great way to see what 2 finishes will look like and compare.

Detailed crown molding was base coated in Scandinavian Pink, top coated with Cream and then distressed back with 200 grit sand paper to achieve this worn look.
A tiny amount of clear wax was applied and then integrated into the paint. This left a beautiful sheen on the board.

This next practice board was so simple... just a couple of coats of Paris Grey. When the paint dried it was sanded to a smooth-as-glass finish by "massaging" it with very very fine sandpaper. There really is a technique to sanding a piece!
I then gave the front a dark stain just to see how it would look. Because the practice board was sanded to such a smooth finish first, the dark wax "took" to the piece quite differently!
And how do I remember all of this? I wrote the technique I used for each piece on the back of it!
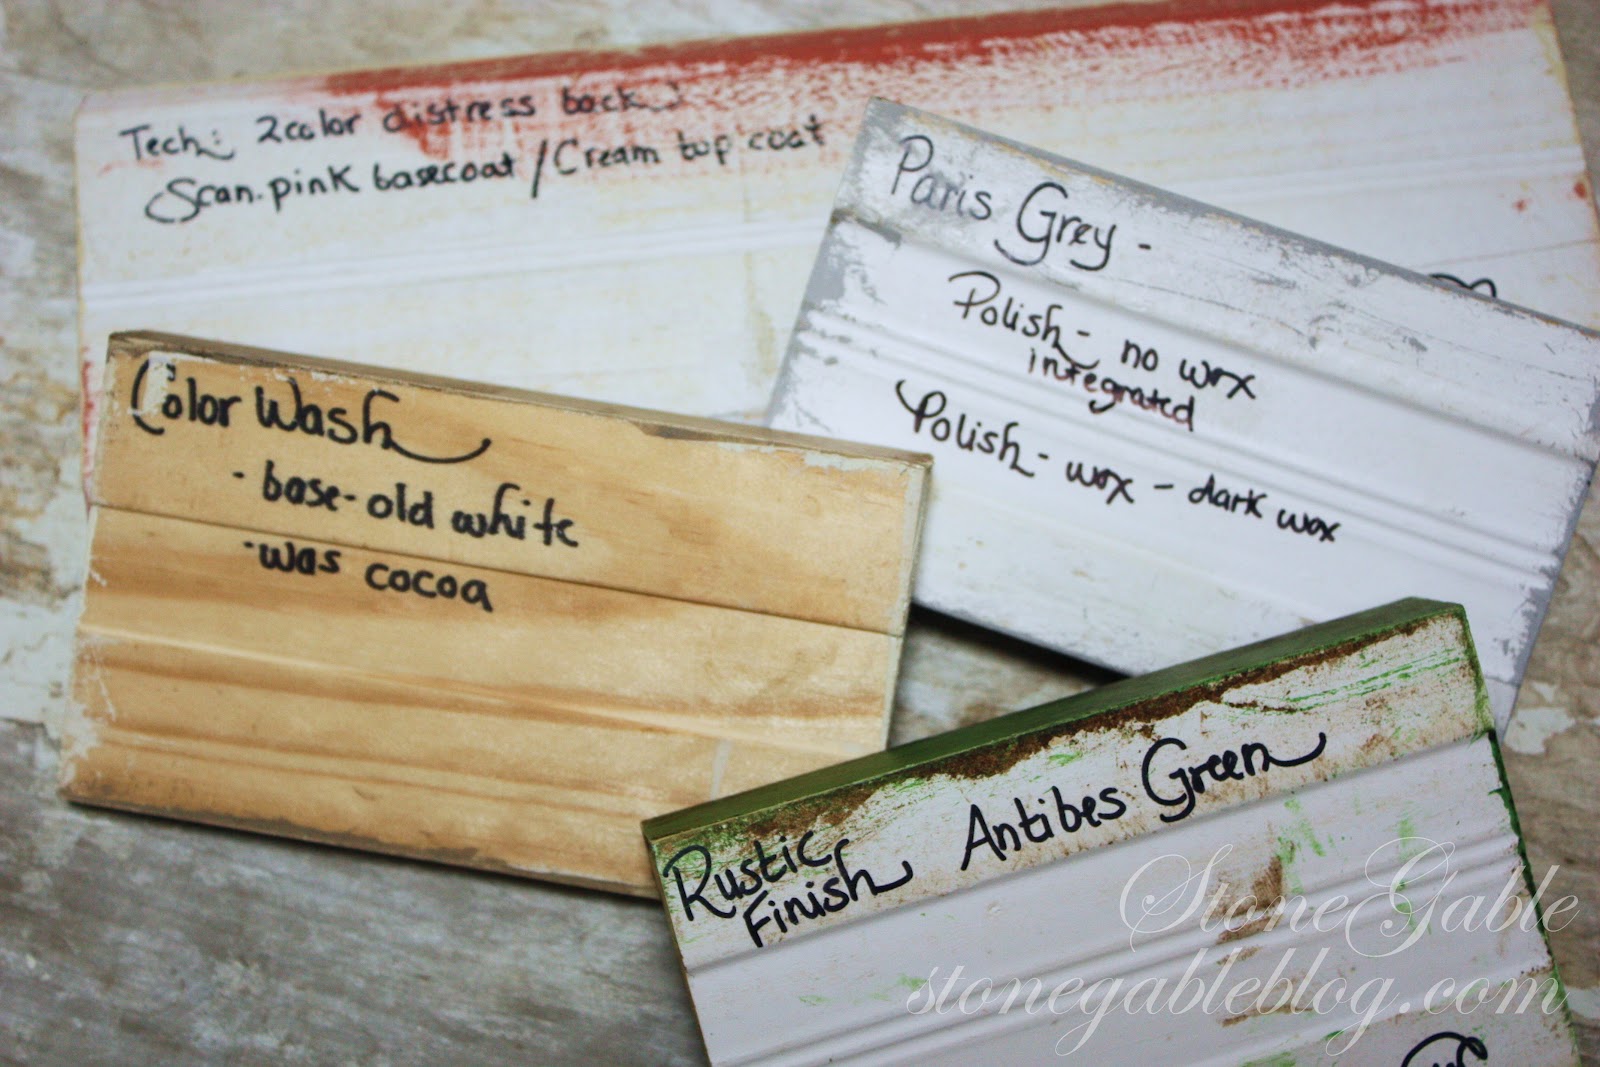
I save all my practice boards in a basket. I am building a "technique library"

I will be sharing all kinds of great painting ideas and techniques with you... and an interview with Celeste from Catfish Creative Furnishings. Look for upcoming posts!

Happy Painting!
Join me for TUTORIALS TIPS AND TIDBITS tonight at 8:00!

Join me for TUTORIALS TIPS AND TIDBITS tonight at 8:00!


Yvonne your sample boards are beautiful! I can't wait to hear about how you achieved the color wash look. I would love to do that to the coffee table in my living room.
ReplyDeleteI really need to take an ASCP class, too. I've just been winging it so far. Very sadly, our local ASCP stockist/instructor was killed in an ATV accident, but her sister is taking over the studio and will eventually give lessons. Great tip on making sample 'boards'. See you tonight for the par-tay!
ReplyDeleteGreat tip! I do this with walls, but have never thought of testing before finishing a piece of furniture. I am going to finish a buffet and dining chairs soon wit ASCP, so this is a helpful hint!
ReplyDeleteHappy Wednesday.
Teresa
xoxo
so many great ideas! Thanks for sharing them with us!
ReplyDeleteNice finishes, Yvonne. Loving the green.
ReplyDeleteI can't wait to use these tips! I love the green especially
ReplyDeleteWow, you made "Our Lesson" look so easy AND the finished products are SO IMPRESSIVE! Thank you for all that knowledge you shared with us... You are such a Sweetie!
ReplyDeleteBig Hugs,
Donna
yay!!! thanks for sharing..I am really liking that green these days
ReplyDeleteYvonne,
ReplyDeleteLovely sample boards! I'm drawn to the grey paint! Although, I do have a magnificient handy man...he probably wouldn't go for any of these finishes. Guess that means, I'll be back to pick up some more creative technigues! Thanks for sharing what you've learned with all of us! Your sweet comment and visit On Crooked Creek today blessed my heart and soul!
Fondly,
Pat
Yvonne, you have shared some fantastic information and ideas. Great plan to have a basket full of practice boards all labeled with details. I want to try painting something. You make it look like fun!
ReplyDeleteThanks for the great tips Yvonne, I'm planning on painting my kitchen cupboards this fall and I certainly put this information to good use.
ReplyDeleteOh my word, this all looks amazing. I need to go to one of those classes. Your finishes are stunning. Hugs, Marty
ReplyDeleteYou are so sweet to share your knowledge with everyone. It;s like getting a FREE CLASS!!!! XO, Pinky
ReplyDeletethanks for sharing this was wonderful!!! Pat H
ReplyDeleteYou are so clever!! Saving the practice boards with the details on the back is the brilliant part!!
ReplyDeletePractice boards are a great tip. I've been wanting to take a class and really need to because I know I'd enjoy it so much. I look forward to seeing some of your projects.
ReplyDeleteGreat tips, Yvonne! I look forward to learning more of your techniques in the weeks to come.
ReplyDeleteIsn't ASCP so fun! I'm addicted as you know. I love the board with antibe. I just got a can of that. I also really love how the scandinavian pink looks under the cream. I've never dried that combination before.
ReplyDeleteThis is FABULOUS!!! I took a class too, but some of these techniques are new! Thanks so much for sharing!!! No piece of wood furniture is safe in my house...
ReplyDeleteYour technique library is absolutely brilliant! And I love those samples you made! Patsy from
ReplyDeleteHeARTworks and
papemelroti
Excellent idea! I actually took a decorative painting class back when the earth was cooling, and this is what they taught us. Have I always followed suit? Nah...but it's definitely a great idea! Thanks for visiting my blog and I'll see you later gator at your link party!
ReplyDeleteFab idea to do the practice boards but even better is to write the technique formula on the back - great tip! I haven't yet tried ASCP, but I hope to try it on some furniture makeovers one day soon :~)
ReplyDeleteWhat great tips you have shared!
ReplyDeleteThanks for checking out my DIY burlap chandelier shade and taking the time to comment! To be honest, I almost ditched this idea, but persevered! ;)
All the best!
Great tips, Yvonne. I love your idea of creating the Library. I need to do this also.
ReplyDeleteThis is a really great tip! Thank you for sharing.
ReplyDeleteI love this! I'm going to follow in these footsteps next time I get ready to paint. Thank you.
ReplyDeleteWow! I never cease to be amazed at your wealth of knowledge!!! The idea of keeping the practice boards and making notes on the back is just as brilliant as painting them to start with!!!
ReplyDeleteLove Annie Sloan chalk paint, use it ALL the time but I have never ever heard of putting it in the fridge.
ReplyDeleteI cannot wait to hear more.
Have a great week! Thanks you so very much for sharing.
Great idea about the sample board! Sometimes the simplest ideas are the most helpful!
ReplyDeleteThanks for sharing Yvonne!
ReplyDeleteYvonne what a brilliant way to try different paint colors and finishes!! Thank you for sharing!
ReplyDeletexoxo
Karena
Art by Karena
2012 Artist Series featuring Harrison Howard
Great finishes, Yvonne! Thanks so much for sharing those tips with us.
ReplyDeleteLOVE these paints. Can't wait for the tutorial. Especially loving the green! As always, thanks for sharing.
ReplyDeleteThis is such a great tip, I had to spread the word and share it on Friday Finds!
ReplyDeleteJust Love Your Blog I post it often on my facebook page of course with your name!! My Page is @Savannah Attics I am Very Picky for Myself and Wow You Meet and Exceed all My Needs !!! Thank You Lisa
ReplyDeleteGreat tutorial. I must know about the Antibes Green. Did you just put the paint in the fridge and then paint and then apply dark wax? Love that finish and I'm trying to achieve that very look.
ReplyDeleteI would love to know more about the Antibes Green finish. What were the steps and the fridge tip? Thanks so much!
ReplyDeleteThank you so much, Yvonne! Great tips!
ReplyDeleteHappy Sunday.
Teresa
xoxo
What a great idea to put the notes on the back of each board. Loved this post!
ReplyDeleteLinda
mysewwhatblog
Dear Yvonne, I know some of us (me) want to jump right in; however this shows ow important prep is. Also, later when there are any touch-ups or you want to duplicate on another piece, Voila!!
ReplyDeletexoxo
Karena
Feature: Artist Anne Harwell
The idea to label the practice boards is such a great idea! Thank you.
ReplyDeleteI have learned more in the past hr with you than I thought I knew. It is very nice of you to share. I thank you so much. I can not wait to try all that I learned. again Thank You. Virginia . You Rock.
ReplyDeleteThe finished products you tagged here are so impressive. Thanks for sharing. Crown molding installation
ReplyDeleteWhat great tips. I am wondering the same thing as Maggie. Did you just put the paint in the refrigerator?? Please let me know if you can. Thanks for such great information!
ReplyDeleteCynthia
I keep the leftover paints in small jars with the lid on tightly.
DeleteThank you for the tips! Appreciated by-me-the newbie to all things chalk paint!
ReplyDeleteThank you for these great tips...I am also a soon-to-be convert to Annie Sloan Chalk Paints.
ReplyDelete