Have you ever felt like you stumbled upon a great discovery? Something that everyone should know and if they knew it would be life changing for them. Well, maybe not life changing... but if they knew they would love it!!!
Something that is so so easy and inexpensive and really really trendy!
Okay, today I am sharing ... 1) How to make a perfect bow.... and .... 2) how to make it out of burlap webbing.... BURLAP WEBBING!
Yes, it is THAT great! Just wait...
This is such a crisp, stunner-of-a-bow!
I've been experimenting with different materials that might make great bows and this is the hand's down best!!! And burlap webbing comes in so many colors and striped patterns! I chose natural with a black stripe to make mine.
I've been experimenting with different materials that might make great bows and this is the hand's down best!!! And burlap webbing comes in so many colors and striped patterns! I chose natural with a black stripe to make mine.
I purchased 3 1/2 inch jute burlap webbing from burlapfabric.com . Burlap webbing is used for upholstering furniture, tote bags, luggage racks, belts... and now beautiful bows!!!
It is SO inexpensive I was surprised what an elegant bow it made. And it can be put together in minutes.
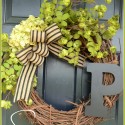
I added the bow to my BURLAP WREATH as well as a few loops of the webbing in the wreath itself. For a step-by-step DIY click HERE
I must give a huge shout-out to my friend Ann from ON SUTTON PLACE for her fabulous bow making instructions. I was originally going to use them (they are the best on the internet) but had to change her instructions because burlap webbing is much thicker than burlap bow fabric. Her post is a must-see!
I did use some of her stapling tips! Thanks for always inspiring, Ann!
STONEGABLE PERFECT BURLAP WEBBING BOW
This will make a generous 12" x 3 1/2" bow with 12 " tails
Here's what you need:
Here's what you need:
3 1/2 burlap webbing... about 2 yards
cut 25" for the bow body
cut 25" for the bow tail
cut 6 inches for the bow center
stapler and staples
craft wire and wire cutters
hot glue
scissors
scissors
1. Make sure you use 3 1/2 burlap webbing. It will make a gorgeous bow.
2. Using the 25 inches of burlap webbing for the bow body overlap the ends at the center and staple.
3. Accordion pleat the center of the bow body and wire it tightly together. Clip the wire ends.
4. Find the center of the tail piece and wire it like the center of the bow. Make french cuts at the end of the tails.
5. Lay the tail right side up on a work surface and then the bow body right side up on top of the tail.
If you want to wire the burlap webbing bow onto something like a wreath, you should cut a long length of wire and put the wire down on your work space first. Then when your bow is finished the wire is attached to the bow.
6. Determine how thick you want the bow center and fold the 6 inch strip of webbing to that size.
I wanted the black stripe to be in the center of the bow so I folded one long end under just a little and the other long end under more to center the stripe.
Staple the center webbing along the open side closer to the ends.
7. Wrap the bow center around the body and the tail of the bow. Cut off the excess length of the bow center, leaving just enough of the webbing to glue to the back of the bow.
Now you can be in on my burlap webbing discovery too! I feel a burlap webbing bow craze coming on!!!!
Remember to
I'm so happy to be part of this great group of bloggers celebrating summer...
Make sure you check out these very fun, very personal and very lovely posts!!! I was laughing and in tears today!!!
Make sure you check out these very fun, very personal and very lovely posts!!! I was laughing and in tears today!!!
Wednesday, June 18th
Thursday, June 19th
Friday, June 20th
Saturday, June 21st


.jpg)


Thanks for this awesome tutorial!! I can never get my bows to look like a professional's. Now I think I'll try again!
ReplyDeleteI always love your bow tutorials and your gorgeous wreaths!....Hope you are having a wonderful week!!!
ReplyDeleteLove that ribbon. Looks like French linen.
ReplyDeleteGreat, quick tutorial!
Thanks for sharing, Yvonne!
Love everything you do Yvonne!! Beautiful!
ReplyDeleteLove it! Love me some burlap! Hugs and blessings, Cindy
ReplyDeleteThis is so pretty and thanks for the tips. PINNED!!!
ReplyDeleteCynthia
Your wreath with the burlap bow attached is very attractive. In fact I admired it so much that I now have gathered most of the materials to create one for myself! Frankly, I'm surprised that the burlap upholstery stripping hasn't already become popular as you suggested. When I worked at Calico Corners, I always would imagine what that burlap weaving could end up as - it definitely has more than one life!
ReplyDeleteSo thankful you think of everything when you write a post! I read the post and then was like "where are the instructions to make the wreath??", scrolled back up and there is was! :-D I just love this! (also I have been meaning to tell you how much I appreciate you not adding music to your blog. It is something that is very annoying to me when spend time reading blogs. Sometimes I will have something else going on in the background in my house or listening to something else so it makes it nice not to have to mess with turning it off or being startled but some loud music coming on when you aren't expecting it! ;-)) Sharon Geers
ReplyDeleteEvery time I make a bow, I have to read instructions! Since I won't remember how to make this stunning bow, I'm pinning it!
ReplyDelete