What goes better with all those tomatoes and basil growing rioteously in the garden than mozzarella? Just a drizzle of great olive oil and a sprinkle of sea salt and you have summer on a plate! The only thing that could make this dish more heavenly is if the mozzarella cheese was homemade!
It is very easy to make fresh mozzarella and sooooo much more delicious. Here at StoneGable fresh mozzarella has been made for years. It is culinary therapy! The process just makes me feel good!
There are a couple of ingredients that go into making homemade mozzarella that you may not be familiar with. Citric Acid and Rennet. Citric acid makes the cheese stretch and hold together, and rennet makes the milk curd.
They must be used to make fresh mozzarella. I purchased them on line under $8.00. And I have enough to last quite awhile. I use the liquid rennet but if you buy the tablets they can be frozen and will last for a very long time in the freezer. I ordered the citric acid ( most drugs stores carry it too) and rennet form New England Cheesemaking. Click HERE to see their website.
Guess what I'm having for lunch? YUMMY!
StoneGable Fresh Mozzarella
1 gallon whole milk, (if you can get raw milk use that)
2 tsp citric acid
2/3 tsp rennet ( or 1/2 tablet)
1/4 cup non chlorinated water
1-2 tsp salt
thermometer that measures 55 degrees to over 110
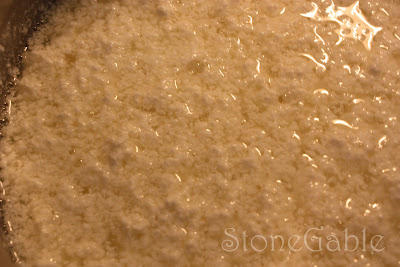
WARNING: The pictures of cheese making are not very pretty. So sorry! But the results are worth suffering through the images. See what you get...
AN IMPORTANT NOTE: Success in mozzarella making depends on a few things. One, heating the milk very slowly. Set your stove on the very lowest heat. The milk won't curd right if you heat it too fast.
Two, stirring gently. It is more like slightly moving the curds and whey a little to distribute heat. Just the most gentle hand is needed!
Three, make sure you keep an eye on the thermometer. Don't overcook your milk!
Back to the Recipe:
Add rennet to 1/4 cup of water and set aside.
Put milk into a non reactive pot ( not aluminum or cast iron, use stainless steel) and sprinkle with 2 tsp of citric acid. Stir. Cook milk on LOW heat. Bring milk to 88 degrees stirring VERY GENTLY a few times. Milk will begin to get little curds.
When milk has reached 88 degrees pour rennet mixed with water into the milk. Stir to evenly distribute. Stir VERY GENTLY a couple of times until milk reaches 105 degrees and curds have formed. Try not to break apart any large curds. Turn off heat. Put lid on pot and let it sit for 15 minutes.
Wrap them in parchment, plastic wrap or waxed paper and refrigerate.
Homemade Mozzarella is delicious! And when you make it once, you will want to make it and keep it on hand.
2 tsp citric acid
2/3 tsp rennet ( or 1/2 tablet)
1/4 cup non chlorinated water
1-2 tsp salt
thermometer that measures 55 degrees to over 110
WARNING: The pictures of cheese making are not very pretty. So sorry! But the results are worth suffering through the images. See what you get...
AN IMPORTANT NOTE: Success in mozzarella making depends on a few things. One, heating the milk very slowly. Set your stove on the very lowest heat. The milk won't curd right if you heat it too fast.
Two, stirring gently. It is more like slightly moving the curds and whey a little to distribute heat. Just the most gentle hand is needed!
Three, make sure you keep an eye on the thermometer. Don't overcook your milk!
Back to the Recipe:
Add rennet to 1/4 cup of water and set aside.
Put milk into a non reactive pot ( not aluminum or cast iron, use stainless steel) and sprinkle with 2 tsp of citric acid. Stir. Cook milk on LOW heat. Bring milk to 88 degrees stirring VERY GENTLY a few times. Milk will begin to get little curds.
When milk has reached 88 degrees pour rennet mixed with water into the milk. Stir to evenly distribute. Stir VERY GENTLY a couple of times until milk reaches 105 degrees and curds have formed. Try not to break apart any large curds. Turn off heat. Put lid on pot and let it sit for 15 minutes.
Using a slotted spoon, scoop out curds into a microwave proof bowl. The whey should be discarded. There are great nutritional benefits from whey. The Internet is full of great whey ideas.
Using the back of a slotted spoon, squeeze the curds on the side of the bowl releasing the whey inside the curds. Discard whey.
Put bowl in the microwave and microwave on high for 30 seconds. This is where it can get a little tricky. Many recipes call for as much as 2 minutes. It depends on your microwave. I say go gentle! You can always keep reheating. Using your hand if you can, gently squeeze the curds into the side of the bowl and gently press the curds together in a kneading fashion.
There is a balance here. You want to squeeze and kneed the cheese enough to release the whey and to form the cheese, but if you get too aggressive it will become rubbery. You will know when you make it.
Put the cheese back into the microwave and heat it on high for 20 seconds. Remove from microwave. Add salt and kneed the cheese until it gets just a little shiny and sticks together. DON'T overdo it! I tend to like my mozzarella on the soft side. It only takes a few seconds.
Separate the cheese into 2 balls and make them into logs.
Wrap them in parchment, plastic wrap or waxed paper and refrigerate.
Homemade Mozzarella is delicious! And when you make it once, you will want to make it and keep it on hand.
Use it on pizzas, in lasagna,or on any Italian food. My favorite way to eat fresh mozzarella is to tear it and serve they torn pieces on a plate with tomatoes. Don't forget to sprinkle basil chiffonades and drizzle the best olive oil over everything. A little pinch of sea salt and your meal is ready. As a bonus I added some briny olives. Can I get a YUMMY!
Just look at all that deliciousness! Cut into slices or torn into tempting chunks homemade fresh mozzarella is a far superior to any store bought brand.
Bon Appetit!
I am participating in Foodie Friday hosted by Michael Lee at Designs By Gollum. Click HERE to visit.


.jpg)


I have always wanted to try to make it. Wow your directions are wonderful! Always love visiting you!
ReplyDeleteoooh I am so excited to try cheesemaking!!!
ReplyDeleteAm I brave enough to make my own cheese... well, here go's. Will give it a try.. thanks for posting this!
ReplyDeleteSandy
One more question.. can this be made with rice milk.. my daughter and her family are vegan and do not eat normal cheese.. hmmmm? No harm in trying.. thanks again!
ReplyDeleteSandy
This looks great and I'll bet the taste is just wonderful-enjoy!
ReplyDeleteOf course you can make homemade mozzarella. I have been buying skim milk mozzarella at our Sprouts store, ummm so good and less calories than cheddar!
ReplyDeleteYvonne, I am not a cook... I really don't like it! But I LOVE food... good food! And I LOVE to visit your blog and DROOL over your creations! :)
ReplyDeleteHi Yvonne,
ReplyDeletethat sounds phantastic and I will definately try to make it. Thank you so much for sharing this recipe.
Greetings, Johanna
You make it sound so easy. Is it really that easy?
ReplyDeleteI have wanted to make cheese but was too afraid.
Maybe I'll try now....
Take care-
Cindy
Sounds easy, but I don't think it is that easy! I love the cheese though and with tomatoes!
ReplyDeleteI am definitely going to try making my own mozzarella! This is a wonderful, step-by-step tutorial, Yvonne! I just love Caprese salads and this is the time to enjoy those fresh, garden tomatoes.
ReplyDeleteThank you!
Susan
Ahhh... I'm completely in awe! You are the food blog queen!!!
ReplyDelete:)
ButterYum
Yvonne, you make it sound so easy. I think you should have a cheese making class at your home. Just think bloggers will be at your door!
ReplyDeleteThank you for the step by step "how to" I might have to give this a whirl!
Mary
From Virginia
Great post and tutorial. I finally began making my own mozzarella last year. I do not know what took me so long to try making it considering how much I use it. I love Insalata Caprese and also like to put it (sald) on ciabatta bread.
ReplyDelete~ Tracy
Yvonne, we love hosting cheese making parties- the only down side is how fast it disappears!
ReplyDeletexoxo pattie
This is just amamzing! Since I planted a garden for the first time last year, I am just now getting into how much better things taste when they are fresh and freshly made! I can only imagine how wonderful this taste! It just jumps off the screen! Thank you for your kind comments from last Sunday! I am now going back through some of your posts that I missed! I don't like to miss a one! three pixie lane
ReplyDeleteYour photos are absolutely amazing!! Are you a professional photographer?
ReplyDeleteOH!!! What a great idea for you to have a class at your home!!!! I would SO be there!!!!! What do you think???:):) XO, Pinky
ReplyDeleteI have not tried making my own cheese yet, but I really want too. This tutorial is great and the mozzarella looks divine! I want to try goat cheese too!
ReplyDeleteYumm! I've always wanted to try cheese making and I think mozzarella and riccotta are the two people usually suggest starting with!
ReplyDeleteManuela
Well I've been waiting for this one. This is one of my favorite foods. It must be just delicious. I'm putting this in my "to do" file. Thank you!
ReplyDeleteHow fun! Someday I'll have to venture into cheese making.
ReplyDeleteYour photos make me hungry--delicious looking. I used to make our cottage cheese for lasagna this way when we lived in Africa...and even some here in the States to show homeschoolers how cheese is made. I used vinegar into boiling milk, let it drain in a cheese cloth and added a bit of salt and milk if I wanted it a bit runny like cottage cheese. It's always fun to see the change come! I think I may try your recipe sometime to make the real stuff, not just cottage ...
ReplyDeleteHave a great weekend!
Yvonne,
ReplyDeleteYou make everything look so good. Quite honestly plain old mozzarella has little personality, but yours is jumping off the page screaming, "Eat me, eat me!" You are just an amazing homemaker and I love following your blog...please consider running my life for me!
My family will love you for this! I am going to give it a try while tomatoes and basil are still fresh and plentiful.
ReplyDeleteBeing from Wisconsin originally, I am a bit of a cheese snob and good quality cheese is a must. I love the idea of trying to make my own mozzarella.
ReplyDeleteWe made cheddar for a science project with one of the kids a few years ago. This will be great with all of the tomatoes and basil I have in the garden.
We love fresh mozz and my children have often joked that we need a fresh mozzerella tree. Well this may be the next best thing!
ReplyDelete- The Tablescaper
YYUUMM!! Thank you for the WONDERFUL instructions!! You make it look so easy, I am going to try it!! XXOO, Damaris
ReplyDeleteThis was fascinating! This is just the kind of thing Mr. Deer would do! XX!
ReplyDeleteI would love to try this but have no confidence in my cooking skills!
ReplyDeleteMy husband would think he had died and gone to heaven if I made this and if it actually turned out edible!
I read an article a couple of years ago about this and they recommended an online kit. I think the gal/writer made it 2 or 3 times before getting it right, but when she did..... she said it was to die for! It intimidated me... never ordered the kit. Yvonne, I will try this over the summer and will let you know!
xx
A
Thanks for the tutorial. I want to try this.
ReplyDeleteBe sure to stop by my blog Tuesday to enter my giveaway.
Have a great week! La
Your fresh mozarrella looks fabulous! I can buy it made fresh in local Italian deli stores but I've always wanted to learn how to make my own! Wonderful tutorial..thanks so much!
ReplyDeleteI absolutely love your website. Love your easy directions. I will definitely try this. Is it my computer or are there letters missing in your instructions?
ReplyDelete